- What Is An AeroPress?
- AeroPress Review: Should You Really Consider Using an AeroPress?
- What Does the AeroPress Coffee Maker Come with?
- Do You Need Additional Accessories for the AeroPress?
- Who’s The AeroPress Best Suited For?
- Who Shouldn’t Buy An AeroPress?
- Is AeroPress Good For Espresso?
- How to Brew Coffee with an AeroPress
- Final Word
Ah… The AeroPress.
If you’re looking for a fast coffee maker, go for a Nespresso machine.
If you want an easy-to-use coffee machine, go for the French Press.
If, on the other hand, you want great-tasting coffee, use the pour over coffee maker.
But, if you want a coffee maker that combines all the three, go for the AeroPress.
Whether you’re new to the world of specialty coffee, or you’re an experienced home barista conversant with all other coffee brewing methods, welcome to AeroPress!
In this AeroPress review, we’ll cover the reason why this coffee maker is on everyone’s lips, who it’s for, how to brew a delicious cup of coffee or espresso with it plus much more.
Let’s dive in.
We want you to know this post contains affiliate links. If you click on a product and decide to buy it we may earn a small commission at no extra cost to you.
What Is An AeroPress?
An AeroPress is an innovatively simple and fun machine that uses gravity and pressure to produce a remarkably tasty cup of cold or hot brewed coffee within minutes.
And it’s compact too, which is why it’s a popular travel companion. While AeroPress uses an immersion brew style, it only immerses the coffee grounds for a couple of seconds.
The grinds used with this machine are typically fine, like those used to make espresso.
After immersing the grounds for a short duration, you need to manually push a plunger to force water out of the brewer. A filter helps to retain the grinds within the brew chamber.
During the 90s, designer Alan Adler decided to make a device that could brew a strong cup of coffee within the shortest time possible.
To achieve this, he invented a piece of equipment that uses pressure to brew coffee quickly, like espresso machines do.
Adler tested at least 40 iterations and released an impressive design for public use in 1994.
The coffee maker, which is now one of the most popular among coffee enthusiasts, provides an easy and quick way to brew a cup of delicious coffee.
After grinding your coffee beans and heating the water, it takes under two minutes to brew coffee with this coffee maker particularly by following the recipe indicated on the box.
That recipe will give you approximately 4 oz of full-bodied coffee, which isn’t purely an espresso.
It’s recommended that you add some hot water into it before drinking, just like an Americano.
But you don’t have to stick to the recipe on the box. You can explore more AeroPress coffee making recipes online.
As you’ll learn from our AeroPress review, the coffee maker’s popularity is mainly due to its:
· Affordable price
· Compact size
· Durability
· Portability
AeroPress Review: Should You Really Consider Using an AeroPress?
If you travel often or like camping, then chances are your travel bag or backpack is already full of other items, so you probably don’t have space for a bulky coffee maker.
That’s where an AeroPress comes into the picture – its compact size won’t take a lot of space in your bag (plus it won’t weigh you down if you have to go hiking).
While the small size is a plus for those of us on the move, it can also be a challenge when it comes to capacity.
If you just want to brew a cup or two for yourself, you’re good to go, but if you’ve got a group of friends who love coffee like you do, or want to brew coffee for the entire family, then you may need a bigger coffee maker.
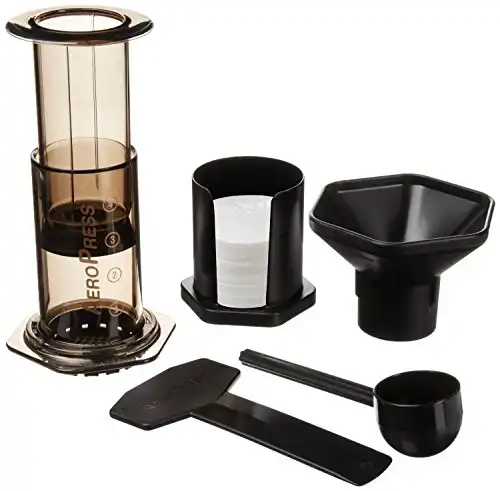
What Does the AeroPress Coffee Maker Come with?
This coffee maker comes with everything you need to make a perfect cup of coffee. Here’s what you’ll find in the standard kit:
· Brew chamber – for immersing grounds
· Funnel – Gets grounds into the brew chamber without creating a mess
· Scoop – Measures grounds (although you can also use a scale)
· Plunger –Forces brewed coffee from the chamber
· Stirrer – For stirring immersed grounds
· Paper filters – Keeps grounds in the brew chamber while plunging
· Tote bag – Compactly packs up the AeroPress and other accessories
· Filter holder – holds the paper filters in place
· Metal filter – Can be used in place of paper filters
Do You Need Additional Accessories for the AeroPress?
To make great-tasting coffee with your AeroPress coffee maker, you may want to get a couple of accessories. While some accessories are mandatory, others are optional.
Must-Have Accessories
· A scale
Optional Accessories
· A brew station
· A metal filter
· A thermometer
· A gooseneck kettle
When choosing freshly roasted coffee, it’s best to go for one that’s been roasted in the past two to three weeks. This helps to ensure you brew a delicious cuppa.
As already intimated, we recommend the use of a scale instead of a scoop for measuring your coffee.
Besides, when brewing with AeroPress, it’s best to use an automatic burr grinder rather than a manual one.
Design
The latest AeroPress coffee maker, which is visible in both the AeroPress Go and the original AeroPress, consists of three major parts:
· The chamber
· The plunger
· The filter cap
Since 2009 the AeroPress has been made with plastics that are Bisphenol A (BPA), free. Although the AeroPress machines made before 2009 contained BPA (which is why you want to ensure you’ve got the latest version).
Timeline:
· Polypropylene – July 2014 – present
· Copolyester – August 2009 – June 2014
The Food and Drug Administration (FDA) has approved all the three plastics for use in beverages and foods.
Ease of Use
Whether you’re just getting started with coffee brewing or an experienced barista, you’re going to get on pretty well with the AeroPress.
Well, you will learn the entire process first, but after brewing a couple of cups, you may as well do it with your eyes closed.
Both the set up and brewing are super fast, and unlike most manual coffee makers, the entire experience won’t feel like an arm workout for you.
All you need to do is to add your freshly ground coffee, pour boiling water whose temperature is between 175 and 205 degrees Fahrenheit, stir it, insert a paper filter into the filter cup, press down the plunger and voila! Your AeroPress coffee is ready.
Expect to produce one to four cups of tasty coffee (one to two mugs) in under two minutes, a shorter brew duration compared to the French press.
To make the coffee making process easy for you, the AeroPress comes with a scoop for measuring coffee grounds as well as a stirrer.
Portability
Our AeroPress review isn’t complete without talking about the device’s portability.
While AeroPress refers to its newer Go model as being travel-friendly, the original model is very portable as well.
Compared to most brittle glass or ceramic coffee makers, the plastic body of the AeroPress is unbreakable and self-contained – the brewer and its accessories fit into a compact cup.
The most interesting part is that you can place a hand grinder into the AeroPress without the need for extra space.
The compact size of the AeroPress is what makes it fit for travel or ideal for a small kitchen space.
It’s not only an incredible camping tool, but you can easily throw it into a suitcase while traveling.
Generally, AeroPress is small, lightweight, and harder to damage or break, thanks to its plastic material. It doesn’t require electricity to operate, which makes it perfect for road trips or camping.
Cleaning
If the process of cleaning a used coffee maker sounds laborious to you, then you should try the AeroPress – it’s so easy to clean!
You simply need to remove the filter cap and press the plunger. The coffee grounds will be ejected effortlessly – just be sure to aim at the garbage can.
The next step is to rinse the rubber seal with warm water and you’re done! The cleaning time isn’t more than five to 10 seconds in total.
Taste
As earlier mentioned, the AeroPress produces delicious coffee, but what exactly determines the taste?
Well, it all comes down to the use of a filter. A paper filter often blocks out most oils from getting into the final cup. Most folks love it this way, as it promotes more subtle coffee flavors. The resulting coffee is aromatic, flavorful, and free from grounds.
But hardcore coffee drinkers (or espresso lovers) would prefer coffee that’s strong and full of oils.
If you’re in this camp, you may want to invest in a good metal filter disk to be used instead of a paper filter. Not only is the metal filter cheap, but it improves the coffee maker’s capability of making a strong cup.
Who’s The AeroPress Best Suited For?
This solid coffee maker can be used for everyday coffee brewing or as a specialized device among your best coffee makers.
The AeroPress is a requirement for anyone who enjoys a flavorful cup of coffee.
Its size, brewing method, and cost, make it perfect for:
· People looking to enjoy a tasty cup of coffee on a budget
· Individuals who want an espresso-like brew but don’t want to buy an espresso machine
· Travelers who want to drink coffee wherever they go without carrying bulky coffee makers
· Anyone who wants to gift a coffee enthusiast that doesn’t own an AeroPress
Who Shouldn’t Buy An AeroPress?
Don’t buy this coffee maker if:
- You like larger amounts of robust coffee – Both the French press and AeroPress brew tasty coffee, but if you enjoy coffee with a robust taste brewed from course grounds, then you’d be better off with the French press that’s available in varying sizes for your caffeinated needs.
- If you want to brew coffee for many people – The AeroPress is suitable for making small amounts of concentrated coffee.
- You want a device to show off in your kitchen – The AeroPress is user-friendly and quick, but its major benefit is the portability. If you don’t plan to carry a coffee machine with you while traveling or you prefer a beautiful coffee maker to place on your countertop, then you may want to look elsewhere.
- You need a coffee maker that you can carry around and drink from – Sure, the AeroPress is highly portable, but you’ll need a glass or mug to drink the coffee it brews. Thus, if you’re interested in a portable coffee maker that can also hold the final product, then the AeroPress won’t be a great choice for your needs.
Is AeroPress Good For Espresso?
To answer this question, let’s begin by defining what an espresso is. An espresso is a concentrated coffee shot produced via an espresso machine by forcing boiling water between super-fine coffee grounds at 7 to 10 bars of pressure.
The main keywords here are:
· 7 to 10 bars of pressure
· Super-fine grounds
· Concentrated beverage
Whether you’re in Italy or New York, espresso will match the above criteria. It’ll be concentrated and rich, and will have a thick crema – a litmus test for espresso.
But these criteria don’t necessarily mean the espresso will be tasty. It only defines an espresso but doesn’t go into the intricacies of taste.
Espresso Machines vs. AeroPress
An espresso machine is a feat of engineering with a water boiler inside it to keep the temperature of water at the right level the entire time.
The group heads contain this water and also keep a steady temperature.
Espresso machines have one or two pumps to generate seven to 10 (or more) bars of pressure, and it’s this amount of pressure that’s known to contribute to the crema’s size.
AeroPress is based on solid engineering too, but in different ways.
It’s compact, brews high-quality coffee, versatile and uses pressure just like an espresso machine. But there’s a distinct difference between the pressure of an AeroPress and that of an espresso maker.
Let’s get to the specifics here.
True espresso originates from 9 bars of pressure from espresso machines. In layman’s language, that amounts to 640 pounds of pressure.
On the other hand, the AeroPress can produce 0.35 to 0.75 bars of pressure, which is typically 25 to 50 pounds of pressure.
Clearly, the difference is vast and producing 640 pounds of pressure from the AeroPress doesn’t sound practical and even if you tried, the coffee maker isn’t meant to stand that amount of pressure.
Granted, using a lot of pressure and fine grounds in your AeroPress can get you a tiny layer of foam, but that’s not anywhere near as the fine crema produced by an espresso machine.
Besides, it’s almost impossible to use your hand to force water through fine grounds in an AeroPress.
In a nutshell, you can’t make true espresso with the AeroPress, as it’s not a real manual espresso maker.
But Wait. There’s AeroPress Espresso!
Despite its shortcomings, the AeroPress is among the easiest ways to brew espresso-like coffee without shelling out hundreds or thousands of dollars on an espresso machine.
It’s possible to brew Aeropress espresso (not the real espresso) from finely ground coffee, a rapid plunge and a small volume of hot water.
While the resulting drink won’t exactly taste like your best espresso, it’s close.
The concentration isn’t like that of a true espresso and it isn’t crema-topped or intense. However, if you do it the right way, it can be tasty and balanced.
French presses and pour over coffee makers can’t make coffee with a similar concentration and balance.
The element of pressure in the AeroPress gives this device a way out.
To make your AeroPress espresso, we suggest that you use a metal filter.
This is because paper grounds tend to block the micro-grounds and oils responsible for espresso-like qualities. To retain these qualities, use a mesh filter.
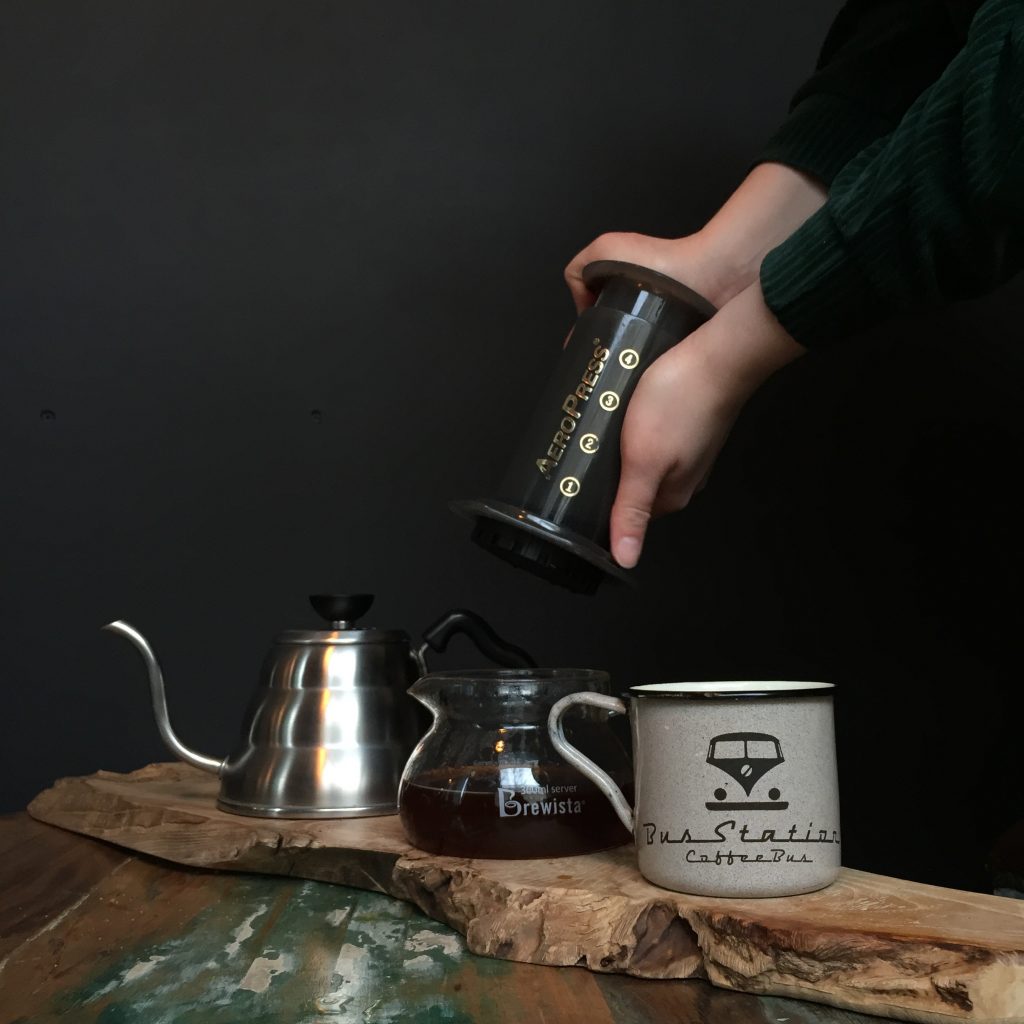
How to Brew Coffee with an AeroPress
To brew a delicious cup of coffee with the AeroPress, follow the following steps:
Step 1
Boil 7 oz (about 200g) of water and weigh 15 to 18 grams of coffee based on your desired strength. Grind the coffee to a texture that’s a little bit finer than that of sea salt.
Step 2
Add a paper filter to the plastic cap
Step 3
Wet the cap and filter using some of the hot water. The water helps in two ways: It heats the brewing vessel and ensures that the filter sticks to the cap.
This step can be challenging because water is hot and the cap isn’t big enough. For your safety, hold the cap by its protruding ends and slowly pour the water so the filter can absorb it.
Step 4
Assemble the AeroPress. Ensure all the parts are dry because the presence of residual moisture may interfere with the gadget’s seal.
Step 5
Place the coffee maker on a scale with its flared end facing upward, and tare the weight. Ensure the numbers look inverted. You may attach a black filter cap and position it right side-up. However, this may cause leakage and impair accurate brewing.
Step 6
Add the freshly ground coffee but exercise caution not to spill any of your grounds on the ring-shaped gutter at the AeroPress’ top.
Step 7
Start a timer and pour water whose weight should be twice that of coffee grounds. For example, if you have 16 grams of coffee, add 32 grams of water. Ensure the water is approximately 200℉.
Step 8
Ensure the coffee grounds are evenly saturated and tamp slightly with a butter knife or paddle. Allow it to rest for thirty seconds.
Step 9
Fill the chamber with the rest of the water
Step 10
Wait for one minute then stir your grounds ten times so they agitate evenly.
Step 11
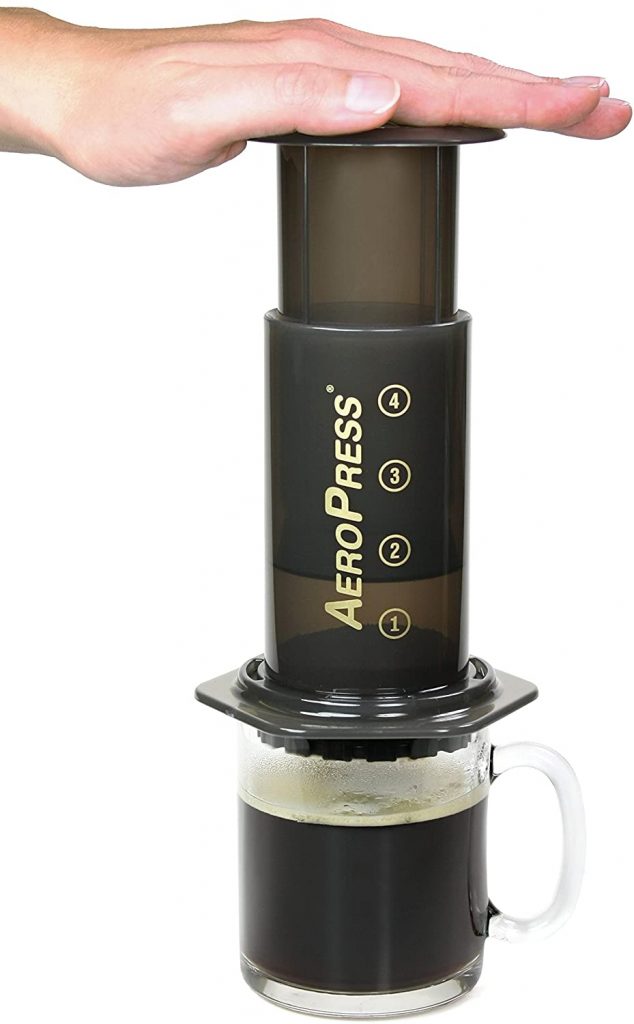
Fasten your cap and ensure it tightly locks into the grooves. Next, flip the entire assembly over quickly but firmly. Position it on your mug or cup and start pressing the plunger downwards.
You’ll most likely experience 30 pounds of pressure at this point. If you don’t encounter any resistance when pushing, then chances are the grounds are too coarse.
If pushing the plunger is extremely hard, then your grinds may be too fine.
You know the coffee is completely brewed after it starts producing a hissing sound. That means there isn’t more water to pass through the AeroPress.
Step 12
After unscrewing the cap, push the unit’s interior section to pop out the filter and condensed grounds into a trashcan.
Final Word
The AeroPress is an innovative device for brewing tasty coffee within a short time. You can also use it to make espresso, but it won’t be true espresso with a powerful crema.
To make strong coffee using this device, consider replacing the paper filter with a mesh filter. After learning more about this device in our AeroPress review above, you can start brewing excellent coffee from your home. What’s more, the device is inexpensive, easy to use and clean. Happy brewing!